Here you can see the transition from the very first 3d draft to a very near to final version of the room.
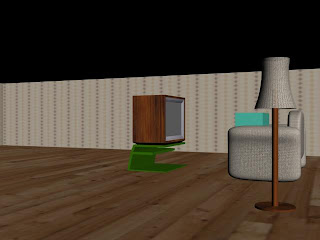
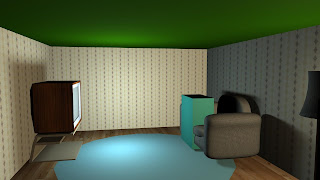
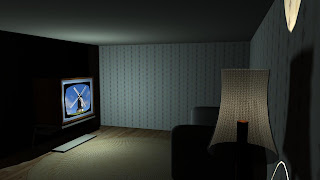
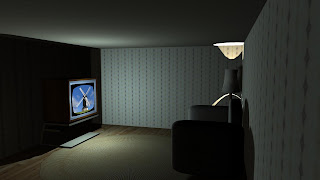
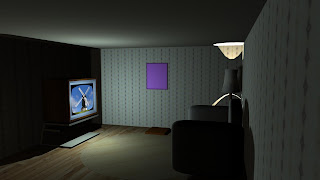
The main objects modelled in the “TV Room” are; a retro looking TV set, standing lamp, sofa and a mirror. All these were modelled and textured by myself. In the last image a windmill image can be seen, this was only a temporary image to see how the TV screens shape looked and how the TV needed to be positioned.
Character creation. To make this process fair the characters are to be modelled by each group member. By doing this the rooms to be modelled by each group member were decided. I choose to do the older character Tommy and therefore do the school of rock room.
Each character was modelling in the same manner and created at the same time myself and Hayley worked very closely together on the characters because we felt they needed to be made correctly the first time round.
To being reference plans were created using sketches scanned into a digital image. The character started life as a simple box, the box was the cut in half and a symmetry modifier added, the next step was to create the create the arms, the arms were created by using the Cut tool and whilst in polygon mode creating a rough arm shape to match the reference image. These polygons were then extruded and scaled down each time to create the arms.

The next stage was the creation of the legs; these were created almost exactly the same as the arms. The feet were also just extruded from the bottom polygons of the legs. The vertexes then adjusted to create the appearance of shoes.

The hands were the next stage, as with all the characters components they were boxed modelled. A basic box with 5x4x2 segments was created the 5 segments provided a polygon each for the fingers and the thumb was extruded out of the side of the box. The end polygon at the palm of the hand was deleted and so was the end of the arm. To connect the arm to the hand the body was attached to the hand to create one object and the borders of the hand and body were bridged this “filled in the gaps” and joint the body to the hands.

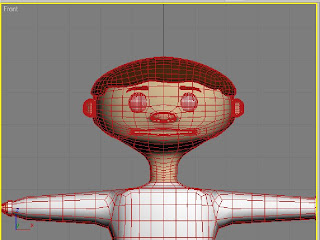
Lastly but not least the head, this provide to be a most troublesome task my character had a rather American football shaped head. In order to achieve this box was created, the faces were then bevelled this gave the box smoother edges; the next step was to turbosmooth the box to create a rough head shape. After adjusting the vertexes the basic head shape was created and the face features could be created.

The facial features were simply created by extruding, inserting and even just moving vertexes around to create the appearance of a smile, nose and ears.


The entire character creation process was rather tricky, this was the first time I had ever tried to model a complete body in 3d. Thankfully due to our characters being cartoon like it did provide a certain amount of forgiveness in the models, features which looked okay for a cartoon would look rather poorly created if it was to represent a real human.
The neck was created by using the same technique used in attaching the characters hands to the arms. The borders of the head and the bottom of the neck were bridged, selecting the number of segments to fill the gap it allows the quick connection of objects which would normally be time consuming to model.

The final stage was the hair, this was a major headache for our group we 0rginally had the idea of creating complex hair styles but given the limited hair features built into 3d max it was agreed that modelling the hair would be the easiest and probably give the best look. The hair was simply created by extruding the top polygons of the characters head; they were extruded to a separated object. This object was then adjusted to create the hair. Once I was happy with this the hair was then attached to the rest of the model.
Textures
Texturing would be a very important part of the animation unrealistic textures could break the animation. The characters themselves had between 12-15 different textures on them, the only way to it was possible to have this many textures per character and then more so on the environment was to very strictly use multi-sub texturing. This provided a near limitless number of textures under one texture group. Each polygon had to be assigned a material ID this corresponded with numbers in the multi-texture and when applied worked in the same way as having multiple different textures.
Each character had to have a UVW unwrap, this feature allowed the textures to map correctly to the model, without this texture stretching and warping occurred and would have hindered the final production of the animation.
No comments:
Post a Comment